How to Digitise Using a Flatbed Scanner
What you will need
Software
Advanced TIFF Editor: For a free trial of this software click here. [I am an Avangate affiliate and receive a small commission for each copy sold.] You can use this software to prepare images of the material in multi-page TIFF format ready to conversion to PDF. This editing software is quite powerful and you will probably only need to use a few of its features.
Adobe Acrobat Writer: This software outputs the TIFF images as PDF documents and produces an overlay of OCRed text which is recognised and indexed by search engines. It may be possible to obtain cheaper PDF writing software from other sources, but they must be able to perform the tasks described below to be useful.
DropBox: This program allows you to back-up and share your files with colleagues easily. The free version gives you 2GB of free storage.
Hardware
PC / Laptop: In order to run the above software you will need a PC or Laptop running MS Windows Operating System. Adobe Acrobat is the most demanding piece of software, so you should check the minimum requirements of both the version of Acrobat Writer you purchase and that of the scanner to ensure that your machine is powerful enough to run them.
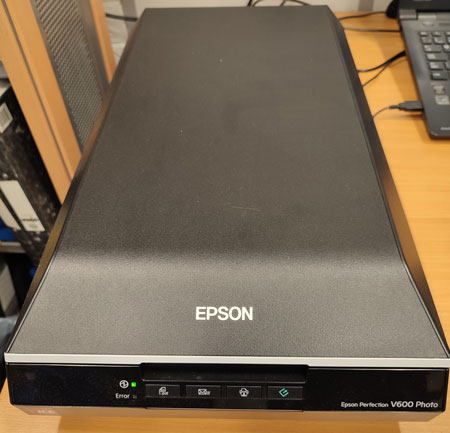
Scanner: You will require a professional quality flat-bed scanner such as the Epson Perfection V600. It is possible to scan material using cheaper scanners, but they are generally much slower and their lamps are not as bright. Using an inferior scanner will increase the length of time spent scanning a result in poorer quality results, especially if the material does not lie completely flat on the scanner platen as in the case of bound journals and books. Investing in a good quality scanner will be worth the extra cost. The scanning software bundled with the scanner is also very important. The Epson V600 was selected because, in my opinion, its scanning software allowed much greatly control over the image quality than that supplied with other models.
The Scanning Process
If the video does not play, use this link to view on YouTube.
1) Running Advanced Tiff Editor
Start the program (with the scanner connected and turned on) and click on the “Acquire” button (it has a picture of a scan on it). This brings up the scanner preview and settings screen. Place the material to be scanned on the platen and click on the “preview” button.
2) Setting scan resolution and colour
Scanning at 300 dpi gives the best balance between image quality and file size. Scan in Black & White unless the bending of the pages means that the text becomes unreadable. In this case Greyscale should be selected, which gives you extra options to improve the image. The increased file size can be reduced using Adobe Acrobat later (see below).
3) Scanning
Once you are happy with the settings click the “Scan” button and see what the scan looks like. If it is OK then continue to the next page and repeat until the document is complete.
4) Saving the images
Save the file using a web-safe file name (one that does not have illegal characters like spaces or capital letters). It will save time if you use the same file-name throughout the process, although the extension will change from .tif to .pdf.
If the video does not play, use this link to view on YouTube.
Processing the images
1) Rotating and cropping
Processing can be done straight after scanning or done in a batch later. Using Advanced Tiff Editor rotate the images (using Select All [CONTROL + A] first). Resize the image so you can see the whole page on the screen and use the crop tool to cut it down to the required size.
2) Cleaning up gutters, spots and shadows
Using the cut tool, cut out and dark edges, spots or other marks. Once all the pages are completed, save the file and exit the program.
If the video does not play, use this link to view on YouTube.
Converting to an OCRed PDF
Open Adobe Acrobat and use the “Recognise Text in Multiple Files” tool to select all the finished files. Select a 300dpi overlay and run.
Final optimisation and output
The outputted pdf file appears automatically on your disk. Check the file size and the quality. If the image quality is poor or the file seems excessively large (experience will tell you this) run Adobe’s file optimisation option.
If the video does not play, use this link to view on YouTube.
If the video does not play, use this link to view on YouTube.